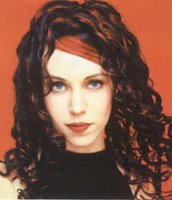
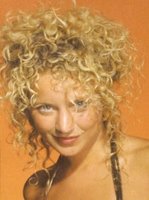
Man's haircut have to be at the minimum irreproachable, but at the maximum stylish & fashionable.
There is no hard criterion in male haircut nowadays. There are lengthened hairs with effect light negligence, or short neat haircut. The Military style occupies the special place. The Hairstyles become manlier.
Wild men are not in fashion. And well-groomed haircuts are saluted!
______
______
______
Curling, cutting, shaving, dyeing - we have done virtually everything to our hair
except let it be. Long free-flowing hair has often been perceived as sexually permissive...
Wednesday, December 20, 2006
Tuesday, December 12, 2006
Fashion hair tendencies winter 2007 from Schwarzkopf Professional’s
Friday, November 03, 2006
Hair tendencies winter 2007
Tuesday, October 31, 2006
Hair Color Woes and Fixes. What to do if your hair color is wrong.
Common hair color mistakes are, well, just too common. Hot lines get claims like: “Help, I tried to bleach my black hair blonde and it’s orange.” Or, “I put crazy colors over my bleached hair and the pink won’t come out.”
Most problems come from overdoing it. Change your color too often, combine color with perms or straighteners or make extreme color changes, and you’re making hay.
If your color is all wrong or too-dark, put in this quick fix:
Mix:
Two ounces of shampoo — preferably, a cleansing product or one that removes build-up.
Two ounces of 20-volume stable peroxide. (This is not the hydrogen peroxide you cleanse cuts with; it’s especially for using with color and is sold in beauty supply stores.)
Powdered bleach—1/4 scoop.
Apply:
Using an applicator bottle or bowl and brush, carefully apply the mixture to color-gone-wrong as you watch in the mirror. The moment the mixture changes color (about 5 minutes), rinse well.
If you have the opposite problem: hair that hasn’t lightened enough, either your hair is too dark to go blonde in a single step or your product and timing was off. Whenever you go from light to dark or vice versa, rely on a professional. Ditto for repeat coloring.
Summary:
But if you’ve just ‘gotta do it, call the hotline number on the side of the color box before you color, tell all about you’ve done to your hair in the past, and get help.
Then, you won’t have to spend your time reading stuff like this, frantically hoping for a solution to Bozo orange hair that’s breaking off in handfuls.
And remember, do not save on cosmetics! Cheap cosmetics can't be good for you in any way!
Thursday, October 19, 2006
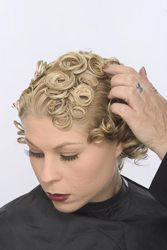
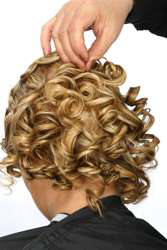
Short Hair Hair-Dos. Make Cute Curls On Short Hair!
Make Hair-Do on Your short Hair!
In order to successfully create pin curls you must have enough hair length and volume to be able to wrap the hair at least one revolution into the shape of a classic pin curl. You will also need enough hair to hold the salon clips securely in place.
Pin curls can be done randomly without any set pattern but the results will be random as well.
For a very finished set it is important to layout a carefully constructed pattern, use uniform sections of hair in each pin curl and wraps the curls in multi-directions.
In some cases if the hair is too short to wrap in one revolution to create a pin curl it might be possible to get better results with a small barrel curling iron or small hair rollers.
However, when short hair is long enough, a pin curl set should be tried because it can offer such a unique and beautiful finished style.
Follow the steps below for a quick pin curl set:
1. Wash and towel blot well to remove excess moisture. A good pin curl set requires hair that is damp but not too wet. (Conditioners will soften hair. If you prefer a firmer set, skip the conditioners if appropriate for your hair.)
Keep in mind that a gel will hold tighter than a mousse but that fine hair would work better with a mousse and medium to thick strands might work best with a gel. For a compromise mix gel with a light styling cream.
2. Use a comb with a long tail to help separate hair into neat sections.
3. Separate strands into 1/4 to 1" uniform sections in the areas of your head where you want the pin curls. (The larger the sections the softer the curl. The smaller - the tighter.)
4. Take individual strands and wrap strands tightly around your finger. It is important to have the proper tension when wrapping. Curls wrapped too loose will not produce the best curls.
Do NOT use traditional bobby pins to secure pin curls which will cause creases in the finished pin curl.
5. Continue to create pin curls until finished. Spritz finished pin curl set with water so that all of the curls dry to a uniform finish. If desired, spritz with a setting spray after misting with water for a firmer hold.
Sit under a hood dryer or use a diffuser on slow, low heat to help speed up the drying time. Ideally, let hair completely air dry or sleep overnight on your set.
When a pin curl set is allowed to air dry or is kept in the hair overnight, the curls are deeper, tighter and will last longer.
After you remove pin curls but before you style them, mist with a good hairspray. Let spray dry and then use fingers to tousle and arrange new curls.
Finish by applying a drop or two of shine serum in the palms of your hands and then brushing over the top of your newly tousled style. For extra hold, spray with a firm holding hair spray.
Monday, October 02, 2006
Straightening hair.
- Straightening: A strong chemical, usually sodium hydroxide, is applied tot he hair and combed through. The hair is forced to remain straight with the wait of the chemical and the combing. The hair is then rinsed of its straightener and neutralized to maintain its desired shape - straight. My brother does this. hehe Don't tell him I told you.
- Relaxing/Relaxer: Normally people think of a relaxer as a straightener but there is a difference. A relaxer can be used to straighten, reduce frizz or for smoothing out curls. It doesn't necessarily mean to completely straighten the hair.
- Texturizing/Chemical Blowout: A relaxer is comb through the hair and left in briefly to loosen the curl pattern. The hair is straightened slightly which makes it appear longer and improves manageability.
- Soft Curl Perm: This is a two-part styling process using a thio-type relaxer to reshape the hairs natural curl. The relaxer is applied and the hair is combed straight making it flexible and more manageable. Then the hair is rinsed and rolled onto perm rods to create a new curl pattern. The thio relaxer is reapplied and and the hair rinsed yet again and neutralized allowing the hair to assume the shape of the rods. Thus, creating a new curl.
Monday, September 25, 2006
Regular Care Of Hair. Some Pieces of Useful Advices.
Taking hair care is in fact much the same as taking skin care. An effective hair care discipline involves cleansing, toning and conditioning routines carried out with religious regularity.
1.Care Of Oily Hair And Scalp Condition:
The principle of care for oily hair and scalp condition is the same as used for oily skin condition. The routine aims at removing the excess oil and to exfoliate skin cells which clogs up and suffocate the hair follicles in our scalp. The emphasis is laid on cleansing and toning routines. Since the hair has to be washed as frequently as it gets dirty and oily, a natural shampoo on a formulation of herbs such as amla, shikakai, trijla is ideal. Massaging hair and scalp is important for the well being as well as good growth of the hair. For dry hair, scalp massaging with oil is recommended. For oily hair massaging with toning lotion is suitable.
Home-made Cosmetics For Oily Hair:
A.Take some dry soap nuts(reetha) and soak them in water overnight. Mash them in the morning and strain the soapy solution. Add a tsp of shikakai powder and wash your hair.If you are unable to make the shampoo cleanser at home, use this infusion recipe.Prepare it and mix in the shampoo you use.
B.To make the infusion, boil two handful of mint leaves in one and a half glass of water for 20 minutes. Strain the solution and mix in a 300ml bottle of shampoo.
Toning Lotion For Oily Hair:
Mix a tbsp of Malt Vinegar in a glass of water.Add a pinch of salt in it.Use 2 tbsps of it on your scalp and massage it with your finger tips twice a week.Leave the lotion on for one hour.Rinse with cool water, brush and set your hair.
2.Care For Dry Hair:
Dry hair tends to be thin and rough.It is susceptible to tangles, damage, breakage and split ends.The primary aim is to replenish the oil and the moisture in the hair.
Home-made Cosmetic Care For Dry Hair:
Below are given few natural recipes that are time-tested.
The Gentle Cleanser:
Beat an egg in a cup of the skimmed milk.When the foam becomes consistent, rub it into the scalp. Leave it on for 5 minutes.Rinse the hair thoroughly with water. Carry out this routine twice a week.
The Protein Conditioner:
Beat one tbsp of castor oil, one tbsp of glycerine, one tbsp of cider vinegar and a tsp of mild herbal shampoo.Apply it on scalp and leave it on for 20 minutes.Rinse with clear water.
A Special Massage Oil Toner
Buy a bottle of castor oil or coconut oil. Add a tsp of lavender essential oil in it.Heat a little and massage it gently on your scalp at night. Rinse or shampoo it out in the morning. Follow this routine at least twice a week.
Wednesday, August 30, 2006
Intimate Hair-do
To shave or not to shave the genitals?
Actually, this question is not so important as many people think. If you cannot decide whether you should get rid of hair on your genitals simply ask your partner's opinion. Tastes as well as sexual preferences differ. Different people love different sex positions, different sex toys, different activities. The same is about genital's appearance. To shave or not to shave? Your partner will answer this question.
Have you find out that your partner does not want to see any hair on the area under your pants? Than shave it off, but do that properly in order to avoid injuries and unpleasant sensations.
Generally speaking intimate women's shaving does not differ much from men's one. The only difference is that men should be more careful as they are more likely to injure tender and vulnerable genital skin. Let us begin with ladies.
Intimate Women's Shaving
Step 1
Put the razor away. You do not need right now. First of all you must cut the hair with help of usual sharp scissors. Cut as much hair as you can. This must necessarily be done, otherwise your shaving will turn into a real torture. You don't want to shave for hours and suffer from pain, do you? Than first cut the hair with scissors!
Step 2
After you have cut off long hair ends, get ready for shaving. This must be done in order to soften the skin and avoid possible irritation. There are a few ways to achieve the necessary effect. The best one is to take a warm bath, because warm water perfectly steams out and softens skin and hair. Another way is to take warm shower giving a special attention to the area you are going to shave. After the bath or the shower properly rub yourself down with a towel and wait for a while to let your body dry.
Step 3
Put on your genitals a considerable amount of shaving cream. Keep in mind that man's shaving cream is not suitable for this purpose. If you did not manage to find a special woman's cream (however, this is very doubtful, because there are lots of special intimate shaving creams for different types of skin), than take the softest men's cream, but make sure it is non-perfumed! Never use soap for intimate shaving! Shave your genitals slowly and gently in the direction the hair grows. Perhaps you will need more than one shaving to make your skin completely smooth. Do not hurry and do not make too rough motions.
Step 4
Make sure you have shaven off everything you wanted and thoroughly wash your genitals with warm water in order to remove shaving cream and hairs.
Step 5
Now you have to care for your skin. Soft baby oil can work wonders! It will keep your skin smooth, tender and will prevent it from pimples.
If you have a sensitive skin, than a cream with aloe vera and vitamin E will suit you best. Indulge your pubis and inner part of lips with cream or oil after each shaving.Attention: if you are going to have sex after shaving and plan to use a condom, than wash away oil or cream before making love. The fact it that oil affects latex and thus diminishes its protective properties. By the way, for the same reason you mustn't use any oils or oil containing lubricant for the same reason.
Tuesday, August 15, 2006
To Perm, Or Not To Perm: A Very Important Question!
More on perming: There are many types of perming techniques involving basically all the same types of strong chemicals. There are Alkaline perms which is a strong formulation using ammominium thioglycolate which is by far the strongest, longest lasting and the smelliest. They are the best formulation for very uneasy-to-curl hair or for creating a very tightly curled do. There are acid-balanced perms which contain a far gentler chemical called glyceryl monothioglycate. It has a lower pH and is good for fine, thin hair or hair that has been previously processed. It is also your best option for a natural, softer curling effect. These must be left on longer or processed with the help of heat sources, like those over-the-head driers you see at salons.
The techniques vary as well...
- Traditional Perm: This technique involves waving or curling the entire head of hair. Rods are usually placed horizontally but there are many configurations that can be done to obtain certain looks or for certain hairstyles or if you have a severe cowlick. This also depends upon curl (rod) size.
- Body Wave Perm: This involves larger diameter rods to create a softer wave instead of a tighter curl. It is a more natural look rather than the curlier types.
- Reverse Perm: This is a form of straightening naturally tight curls to a more relaxed wavy shape. Instead of a head full of tightly wound curls with this technique you receive softer larger curls.
- Spiral Perm: The hair is rolled vertically rather than horizontally resulting in ringlets or corkscrew-like curls. A lot of women with straight long hair get spiral perms.
- Root Perm: I don't believe in these if roots are permed only for volume or lift. They grow out terribly, but if it is for maintenance of a perm, that is normal. The rods are placed only at the root area to curl or give lift to that area only.
- Spot Perm: The rods are placed in certain areas only that need or body or a slight curl to better a style or make it more manageable.
Wednesday, August 09, 2006
To Perm, Or Not To Perm: A Very Important Question!
Most of us have had the memory of a bad perm. It is the equivalent of a mental scar, and a deep one at that. Do you have any idea how long it takes for one of these to grow out? I was scarred emotionall for many years (OK I am exaggerating) 'cause of a bad perm and 6th grade is not the time to get experimented on by your beautician great aunt. Yes, I said beautician. Egad! Here are some tips with which to educate the masses before they go down the same road I did. Also included: tips on straightening (relaxing).
- WARNING! Don't do this yourself, period. I mean it! If you do you run the risk of losing hair, damaging your hairshaft irreversibly and otherwise suffering for months to come. Go to a professional technician, some stylists still can't pull this off.
- Perming and Haircolor: Choose to Perm or Straighten the hair BEFORE you color! Besides, most stylists refuse to color (especially bleach) after a client has a perm. It simply damages an already damaged cuticle more so. Semi-permanent coloring is suggested.
- Perming by Definition: Your hair is tightly wound (depending on the desired result) around curlers of various sizes. A harsh chemical is applied to the hair to "pen the shaft (or to rough it up) and break down the rods in your hairshaft. Then a second chemical is poured on that actually closes the rods or makes the hair retain whatever shape it is in (the curlers). It is kept in for a bit to process and then rinsed out. They carefully unwind the curlers from your hair and you don't get to wash it for days. It is best to wait for as long as you can without getting it wet. Plus even though the formulas have been improved, it still stinks! Straightening works the same way but minus the curlers. They comb your hair straight and if it starts kinking up again they comb it some more, forcing the hairshaft to straighten in addition to the weight of the water and chemicals.
- Pre-Perm: Treat your hair to a few Clarifying shampoos beforehand (especially if you use a lot of products) to strip the hair of its greasy and sticky build up from products and hard water (mineral deposits) can prevent the perm chemicals from penetrating evenly.
- Haircut/Perm: Cut AFTER you perm. That way the style and cut will be designed with the new texture and shape (curl) of the hair. However, if you are going to go dramatically shorter then the stylist should cut your hair a little longer than the desired end result and then process, cutting after the perm is complete.
- Risks: First and foremost, these are chemicals. They can burn and irritate the scalp. Do not subject your scalp to chemicals if it is scratched, sunburned or whatever. Also, your scalp (if you're a woman) is more sensitive right before your period and it can absolutely drive you nuts to have chemicals on you scalp. You will be climbing the walls, itching your head with the point of a pick or comb. you run the risk of losing clumps of hair, especially if your hair is chemically processed prior to getting a perm. You can loose hair if the solution is left on to long as well.
- Processing Time: Beware of the stylist who does not use a timer for perms or forgets how long you have the chemicals in. Ask what time and how long it will be processing for and keep track yourself. Don't hesitate to alert the stylist when your time's up.
- Re-dos: How I wish this didn't happen. There are quite a few times that a perm or coloring does not take place. If your perm does not live up to your standards you should really wait a while before getting a new one (a re-do). You could REALLY damage your hair. It simply isn't worth it.
- Perm After-care: Take care of your hair. It is bad enough you cannot wash your hair until a few days afterward, the longer the better. Use a gentle shampoo, a stronger conditioner and protect your hair chlorine, the sun and excessive heat from curling irons and blow-dryers.
Monday, July 31, 2006
Wedding Hair-Dos.
Bridal Hair Style and Hair Dos
In and about the other preparations for your wedding day, it may be tough to choose the perfect wedding "do," but a little careful planning will go a long way toward making sure your hair is beautiful on your happy day. When selecting a wedding hairstyle, some brides go for a dramatic, impressive up-do. Others choose to let their hair fall enhancing, naturally their style with subtle curls and waves. Whichever option suits you best, the tips and steps outlined below will help to make your hair shiny, strong, and lovely on the day of your wedding.
General Wedding Hair Opinion
Think about the season and climate in which your wedding will be taking place. Will the ceremony be indoors or outdoors? If your wedding is scheduled for a hot, humid time of year, think about an up-styled hairdo to help ward off frizz or limp locks.
Start Wedding Haircare Beforehand
Depending upon the length of your hair, you should begin to think about your hairstyle three to six months in advance of your wedding. Are you thinking about dyeing your hair or getting a perm? Now's the time to experiment. The last thing you should want is to try a brand new color the week before your wedding and have it not work out, leaving you stuck with a shade of blond normally reserved for lemon sherbet. As you begin to consider your wedding day 'do, also think about your wedding dress and the style of veil you'll be wearing. A formal gown might pair well with an up-style, whereas a more casual dress may compliment a loose and flowing hairstyle. Think about your gown's neckline, as well, as this may help to determine which hairstyle will be right for the day of your marriage. During this time period, follow your normal hair care schedule, keeping your tresses healthy and clean.
Wedding Hair Pre-Run
If you're having a stylist do your hair for your wedding day, be sure to schedule a "pre-run" about a month in advance of your marriage. If you know exactly what kind of approach you'd like to take, try to bring pictures from magazines as a reference for your hairstylist. Keep time in mind, as well - your run-through should not take more than an hour and a half, as you probably won't have more than this amount of time to set aside for hair on the day of your wedding. If you've picked one out, have your hairstylist practice with your veil or tiara. If you'll be doing your own styling, gather all the stuff and tools you'll need in a basket for easy storage, and try your hairstyle out! Use a well-lit room, preferably with a large vanity mirror. If you're going for an up-do, consider using hot curlers or rollers, just like Grandma did. Lightly blow dry your hair with the curlers still in. After you remove them, spritz with a bit of hairspray - just enough for your curls to hold their shape. Then, twist your hair up in your favorite style! The curls that rollers create will lend class and beauty to almost any up-do. And, remember that messy is in - it's ok if your wedding hair do isn't classically austere, as long as you think it's beautiful and you love the way it looks.
Wedding Hair Coloring and Trim
Schedule a hair appointment for about two weeks prior to your wedding day for a final trim and color touch up, if appropriate. About this time, you may also want to begin an intensive conditioning regimen, such that your hair will be healthy and full of shine on your wedding day.
Don't over-dry your hair the week before your wedding! Wash your hair every other day, and make sparing use of the blow dryer. If you've got some split ends, use a leave in conditioner on the days you wash your hair. If you're having your nails done, consider scheduling this appointment for the day before your wedding to save time.
Your Wedding Day
Unless you're sure of your product, do not use conditioner the day of your wedding, as it will make your hair limp when it should be full-bodied. If you're doing your own hair, think about where you'll be doing it if it's not in the place that you practiced, will there be sufficient lighting, mirrors, and power outlets for all your tools and accessories? Consider adding a power strip and extension cord to your hair care basket, just in case. If you are working with a stylist, be sure he or she has accurate directions to wherever they will be doing your hair. If a team of hairstylists is working with your bridal party, be sure you clearly communicate exactly how many people's hair they will be doing and how much time they'll have to do the 'dos. Rather than assuming that a stylist will be able to fit one extra person in, check with them beforehand - they may be able to show up a half-hour earlier, saving everyone from a hectic race to beat the clock. Whether you are going for an up-do or a down-do, doing it yourself or working with a hairstylist, planning in advance will help to make sure your wedding hair looks as it should - absolutely you and absolutely beautiful.
Tuesday, July 25, 2006
Having Your Hair Cut: It really isn't a nightmare!
I know most of you don't want your hair cut. But you HAVE to. Honestly, it took me many years to learn that you need a trim regularly to keep the breakage from traveling up the hair shaft. Especially if you have fine hair, prone to breakage. It just has to be done, period. Besides, damaged long hair looks downright nasty!
- Above-the-Shoulder Cuts: This is best for just about every woman of every age group, but is especially beneficial to woman who have fine, limp hair. Add layers around the face to create the illusion of more body.
- Bangs: This is a good haircut for those of you that may have a high or large forehead. It is especially beneficial to those of you that have have a long face and want long hair as well. It balances out the look.
- Long Hair: This is great if you have a heart shaped face or a round face. Make sure you get regular trims to keep breakage at bay! You should go no longer than 3 months without a trim!
- Cutting Your Long Hair Short: Tell your stylist to cut off half the length you wish to cut, ease into it. It is easier to cut off a little more than to grow a lot out. You may just shock yourself into a depression!
- Curly Hair: If your hair is long and thick - great! If it isn't - your hair is going to look straggly. Fine, limp curls should be kept above the shoulder to minimize the appearance of well - fine, limp locks!It just isn't flattering. And if you have limp or fine hair, don't over layer your hair, it does not give your style body, it looks unkempt. A few around the face with a few highlights, or lowlights will benefit you.
- Short to Long: Oh how glacial this process is! And you just hate to trim the ends to add to the fullness. But you must. Your hair needs to be trimmed to stop the damaged ends in its tracks. I know it may look short at first, but it will grow, I promise. Your hair will look fuller in the end.
- WARNING! Apply to an experienced stylist, and one who is open to YOUR desires. No matter what you and I think, A bad haircut does not justify homicide. Even if it is in the heat of passion -- with his or her own scissors! Know before you go. Also, you get what you pay for! And for goodness' sake, don't upset your stylist!
Monday, July 24, 2006
Some more details of hair care.
Shampoo
Everyone is aware of it and everyone uses it: hair shampoo. But what is their effect and from what are they made?
A hair shampoo usually consists of water, sodium laureth, sulfate, polyquaternium-10, coloring substances and aromatic compounds.
To have healthy hair, a person does not need more than a mild and careful cleaning. Of course, using mild shampoos carefully does not mean that a person does not need to daily wash his or hair. For the appropriate care of hair, the usage of shampoo must complement the type of hair.
Not every product is suitable for every kind of hair.
A good shampoo would not harm the skin, nor would it burn the eyes. Rather, it would degrease the hair, it would lend abundance and shine to the hair's surface and, most importantly, it would clean the hair. Since many people produce too much testosterone (a male hormone), which causes greasy hair, most people need to clean their hair regularly.
Water
The type water that people use also plays an important factor in the health of their hair. Sea water and water containing chlorine (such as the kind that will get into hair after a person goes for a swim) should immediately be washed out by clean water because water has a long-term hold in hair.
Drying
Another aspect of healthy hair is drying. It is important that the hair is NOT rubbed dry with a bath-towel since rubbing harms the hair and its structure. One should wrap the towel around the head by winding the towel tightly and carefully tapping the hair dry.
After washing the hair, shampoo must be rinsed out thoroughly. If this is not done, the remaining shampoo will detract from the gloss, fragrance and fluffiness of hair.
Hair combs and brushes
Wet hair should be combed or brushed as little as possible. The better thing to do would be to wait until the hair is entirely dry before beginning the smoothing process with a brush or comb.
After washing and drying, the hair is usually untangled with a brush or comb.
For the best results, hair knots should not be pulled. Instead, the tangled hair should be carefully combed out, starting from the tips and moving toward the roots (from down to up). But which is better, brushing or combing? In most cases, brushing is unfavorable, as it is more harmful to the hair. Combing can be more favorable, but using a comb can be either damaging or profitable to the hair. A horn comb would probably be the best choice when deciding what to use. It is made out of keratin, a material similar to that of hair. A horn comb reduces the electrostatic, or electrical charging in hair. Unfortunately these combs are very expensive and demonstrate sensitivity to both heat and chemicals. Remember to choose combs with blunt-edged points, as all sharp points and edges harm the hair.
Thus, in order to take good care of hair, everyone must never forget to always be aware of his or her needs, whether choosing shampoos, washing the hair, rubbing the hair dry, or combing it out...
Friday, July 21, 2006
Finding a Haircare Regimen For YOU
- Normal Hair: If your hair is not too oily, not too dry, not to thick or thin nor damaged from over processing you have normal hair. If you must wash your hair every day you should use a moisturizing shampoo like TIGI Bedhead moisture maniac shampoo or better and a finishing rinse or light conditioner like TIGI Bedhead moisture maniac conditioner. It is not too harsh nor too light -- kinda inbetween. If you spend a lot of time in the sun or riding motorcycles (or horses) or if you lead an active lifestyle that tosses your locks to the elements you should use a clarifying shampoo once a month or whenever you feel like you have build up and a good protein pack left on for 10-15 minutes.
- Dry Hair: If your hair is brittle and frizzy or lacks shine then you probably have dry hair. I wouldn't recommend washing your hair every day but if you must, you should use a moisturizing shampoo like TIGI Bedhead moisture maniac shampoo and an instant conditioner. Use a good leave in conditioner on the ends if possible. Once a week leave the instant conditioner on for at least five minutes while you do other things such as shave or whatever. Once a month you should use a good protein pack treatment.
- Oily Hair: If your hair seems to over produce oil and your roots just seem greasy you , my dear, have oily hair. You should use a shampoo for oily hair and concentrate on the scalp. You don't necessarily have to thoroughly wash your hair from roots to ends every day. You can instead scrub the scalp gently with the shampoo and when you rinse your hair, both the shaft and ends will be washed by the suds cascading over it.
- Fine/Limp Hair: If your hair seems thin, straight and flat you may have fine/limp hair. You should use a volumizing shampoo and every other day use a light conditioner or finishing rinse, only on the ends. Once a week, especially if you use a lot of styling products, use a clarifying shampoo. You can also try having your hair professionally colored to add volume.
- Thick/Coarse Hair: If your hair feels rough and is pretty thick, resembling horse hair you may have thick/coarse hair. You should use a moisturizing shampoo like TIGI Bedhead moisture maniac and an instant conditioner. Use a clarifying shampoo about once a week in addition to a heavier conditioner or protein pack for chemically processed hair. About once a month, use a protein pack left on for about 30 minutes.
Thursday, July 13, 2006
Products: Shampoos, Conditioners & Hair Masques. Advices how to use them
Like I have said before, everyone has something to sell. There is ever feasible product imaginable out there just waiting for you to either benefit from or spend your money on. Here are some basic tips and problem-specific solutions. Your hair is a direct reflection of what's going on in the inside. And since it takes so unbelievably long (half inch a month growth average) treat it well once it does grow out.
Shampoo: The main function of a shampoo is to remove the oils secreted by the scalp. It also should easily remove product build up without stripping the hair of its natural oils completely. Here the many different types and their specific functions:
Baby Shampoo: These products are very soft and do not contain any harsh chemicals that may irritate the skin and eyes. BUT! my friend told me that these shampoos have a pH of 8, same as the eye, and that is why it doesn't sting your eyes. However, she said leave it for the babies. It doesn't give your hair what it needs. You need a shampoo that has a pH of 4.5 to 5.5
Violet Shampoo: These shampoos contain pigments to filter out the yellowing in gray and blonde hair. I use one of these to take the "brassiness" out of my hair between colorings. They can be drying if they contain lighteners, which most of them do.
Clarifying Shampoo: This is a good product to remove product build up and excess oil. It contains no conditioning agents so I would advise to condition a little after if you want to get a comb through your hair without damaging it.
Pigment Containing Shampoo: you can be familiar with Henna containing shampoos for brown hair and Violets for blondes. Along the same lines as the Violet Shampoos but for darker hair to enrich the color or lengthen the color between salon visits.
Conditioning Shampoo: These products contain added conditioners to simplify the washing showering process. Great for men and children but I don't use these. I need heavier conditioners.
Moisturizing Shampoo: These products contain agents that moisturize rather than stripping. I use TIGI Bedhead moisture maniac PLUS a moisturizing conditioner by ABBA, called Moisture Scentsation. And even a few times a week I use a Lange protein additive with the ABBA conditioner. I also like a detangler, but we'll get to that later.
Dandruff Shampoo: These are coal tar shampoos and medicated products that ease the flaking and itching of this condition. I find this product to dry out the hair. I had to use a Neutrogena coal tar shampoo for about three weeks due to some winter itching. My hair got so dried out. Also, I have heard that if you accustom your scalp to the constant use of this product it can become "addicted" to it. This has not been proven.
Volumizing or Body Shampoo: This product contains agents that cause the hairshaft to swell. It will not give you added thickness however. It contains little or no conditioning agents.
Conditioner: The function of a conditioner is to coat the hair shaft to smooth down the damaged hair shaft, provide protection from curling irons and environmental elements. It can tone down frizziness and ease combing wet hair or brushing dry hair. Personally, I can NOT function without some sort of conditioner. I have fine hair so I can't use a really heavy product or it weighs down the shaft. I have to use a moisturizing conditioner and a protein complex once or twice a week. Here are some typical conditioning formulas.
Instant Conditioner: This is really good for normal or slightly damaged hair. It is a light formula that quickly conditions the hair leaving it looking healthy and protected. This is not a good choice for fine hair. It can weigh the shaft down creating "flatness" and build up resulting in the need for a clarifying shampoo. Do not over condition.
Finishing Rinse: This product is good for very fine, limp hair. It does not weigh down the hair shaft unnecessarily and doesn't have a high build up rate. Although it will not provide enough conditioning properties for overly damaged or dry hair.
Conditioning Packs/Masques: For excessive damage from over-processing or wind and sun damage, chlorine damage and heating elements. This is a good choice to provide deep conditioning for extremely damaged hair or for an every once in a while pack to treat dry hair. If you're hair is breaking you may need moisture although from too much protein you can have breakage as well. Additionally, too much moisture can make the hair feel soggy and really stretchy. But then again so can damage from harsh chemicals. I know this seems confusing so visit a knowledgeable stylist to help you with your hair woes.
Pigment-containing Conditioner: These are additional to the pigment containing shampoos for added depth of color. I use a violent based conditioner very rarely. The formulations for darker hair are better than the ones for lighter shades as the lighter formulation may be drying. Henna conditioners are a good start for deep brown tones whereas walnut is better for darker shades.
Detangler/Leave-in Conditioner: Life'd be very difficult for me if it were not for detanglers. As a child I always had a detangler and even started using the Johnson&Johnson baby detangler in the last two years all over again. It is cheap and I only use a small amount. It does not irritate the scalp and is gentle enough for a baby. It helps for that extra oomph when I need the additional detangling properties without the extra expense. Good for the gym and after swimming! Although my stylists hates when I use it, she will have to live with it - or give me free products.
Tuesday, July 11, 2006
Hair Loss, Baldness. Diet/Food Therapy.
A wholesome diet, rich in silica, calcium and iron, will help reduce or prevent hair loss. Green, leafy vegetables, sea vegetables especially, are good mineral sources. Raw oats provide silica. Dried fruits and cherry juice are rich sources of iron.
For women, thinning hair or hair loss can be a sign of a problem in the gastrointestinal tract. It could be a sign of insufficient stomach acids; It could also mean a deficiency of protein, zinc and other nutrients. Taking two acidophilus pills after or between meals (four to six tablets per day) for two months will help. For men, balding process can be slowed down by taking a low-fat diet. Some scientists postulate that the male pattern baldness is tied to increased testosterone levels during puberty. A high-fat, meat-based diet raises testosterone levels, and that may adversely affect hair follicles. For example, in Japan, male pattern baldness was very rare prior to World War II when the diet was lean and healthy. The Japanese now consume a more fatty, Westernized diet. Baldness is now increasing substantially among Japanese men. Eating low-fat foods may not stop hair loss; but it might help slow down the hair loss.
Anemia is one of the most frequent causes of hair loss. Eat plenty of iron-rich foods, like liver (Avoid while you are pregnant) and other organ meat, whole grain cereals, dark green leafy vegetables, eggs, dates, and raisins.
The hair is comprised mostly of protein. To encourage hair growth, adhere to a diet rich in protein. A recommended diet for this purpose includes calves liver, brewer's yeast, wheat germ, and two tablespoons of granulated lecithin. Along with protein, these foods are also high in B vitamins, an important nutrient for hair.
European studies have found that soy protein reinforces hair and stimulates its growth. In one study, The hair growth increased by 15 percent. Tofu and soy milk are good sources of soy protein. Other good sources of protein are: low-fat beans, fish, cheese, eggs, brewer's yeast, yogurt.
Other important nutrient for hair health is silica. Studies in the former Soviet Union have shown that silica therapy slowed hair loss. Organic silica added to shampoo was found to help prevent baldness, stimulate healthier hair growth and assure beautiful shine, luster and strength. Some scientists claim that they have effectively stopped further hair loss by adding silica to their shampoo. This can be applied externally to regrow already lost hair.
Silica is found in the outer coverings of potatoes, green and red peppers and cucumbers. Bean sprouts are also high in silica. Eat whole foods including sprouts.
Vitamin C improves the absorption of iron.Include a good serving of fruits and vegetables in your diet.
Vitamin E is important for healthy hair growth.Eat avocados, nuts, seeds, and olive oil on a regular basis.
If hair loss is due to thyroid dysfunction, eat more foods rich in vitamin A and iodine. Eat vegetables such as carrots or spinach in unrefined, cold-pressed seed oils such as flax, walnut or pumpkin seed and sea salt. Take turnips, cabbage, mustard, soy beans, peanuts, pine nuts and millet if there is a deficiency of iodine.
Caution: Excessive intake of Vitamin A can cause hair loss.
Friday, June 30, 2006
5 Great Wedding Hair Do's
Classic Updo
Sophisticated updos are always a popular choice, with curls and twists providing a desired bridal look, especially for more formal weddings.
This style is best for hair that is medium in length (chin length or longer) and is straight and medium to thick. If you have fine hair you might be able to create the updo by using a pin-on ponytail or add-on hair strands.
Subscribe to:
Posts (Atom)